


Showing posts with label Signs. Show all posts
Showing posts with label Signs. Show all posts
 I got more compliments from people on this sign at the wedding than I ever imagined I would.
(You can see the first sign that I made for this wedding by clicking here.)
Simplicity was key on this one.
The basic structure was about as simple as it gets.
A 2x4 cut down to 2" x 2" that stands 6 feet tall, surrounded by 1" x 4" boards to keep it stable...


The directional arrows were 1x4's cut down to about 20" long with one end cut to form a point...

Everything got a single coat of white paint. Imperfections in the coat added to the character and charm of the overall sign...
 I added the letters to the arrows the same way that I do all of my lettering around here (click here for the "How-To"), minus the carbon paper. Pine is pretty soft so as I wrote on it I was left with an indentation in the wood...
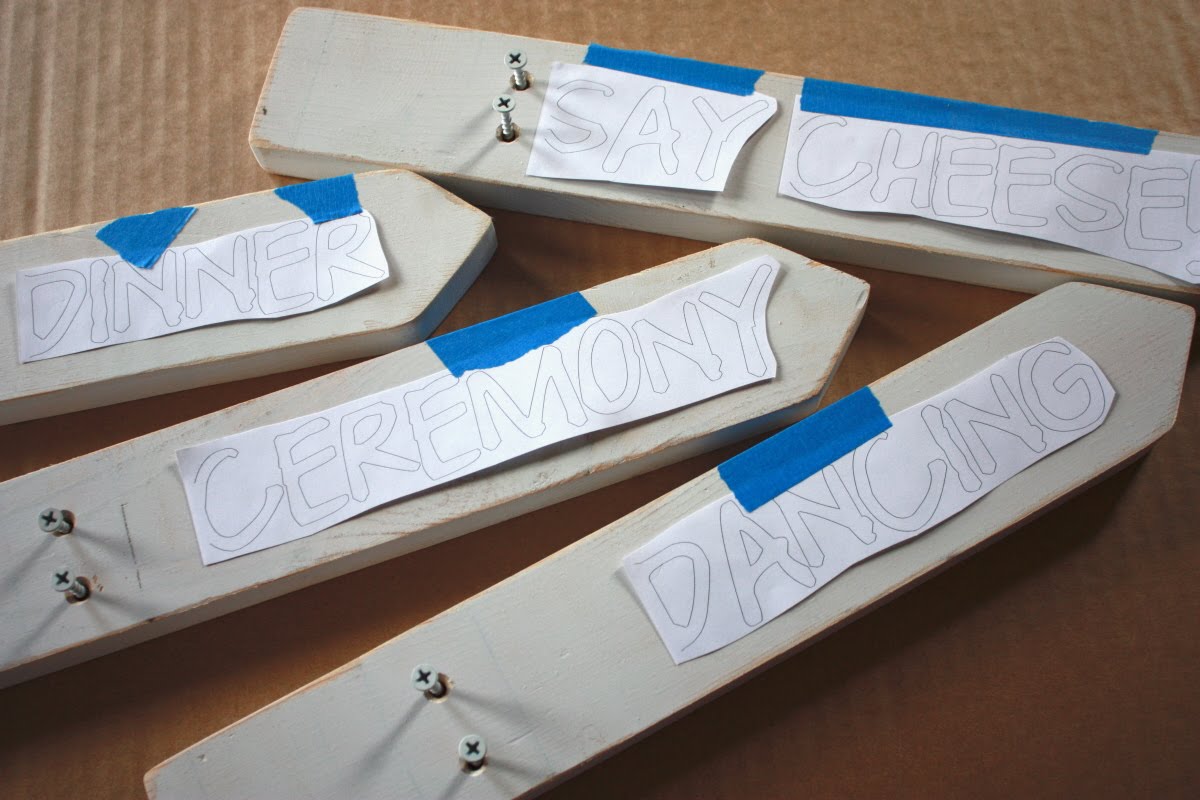 Since I was going for a definite handwritten look, I skipped tracing the letters perfectly and chose to freehand it a bit...
 Using my trusty paint pen, I wrote out each word on the front and back of each arrow...
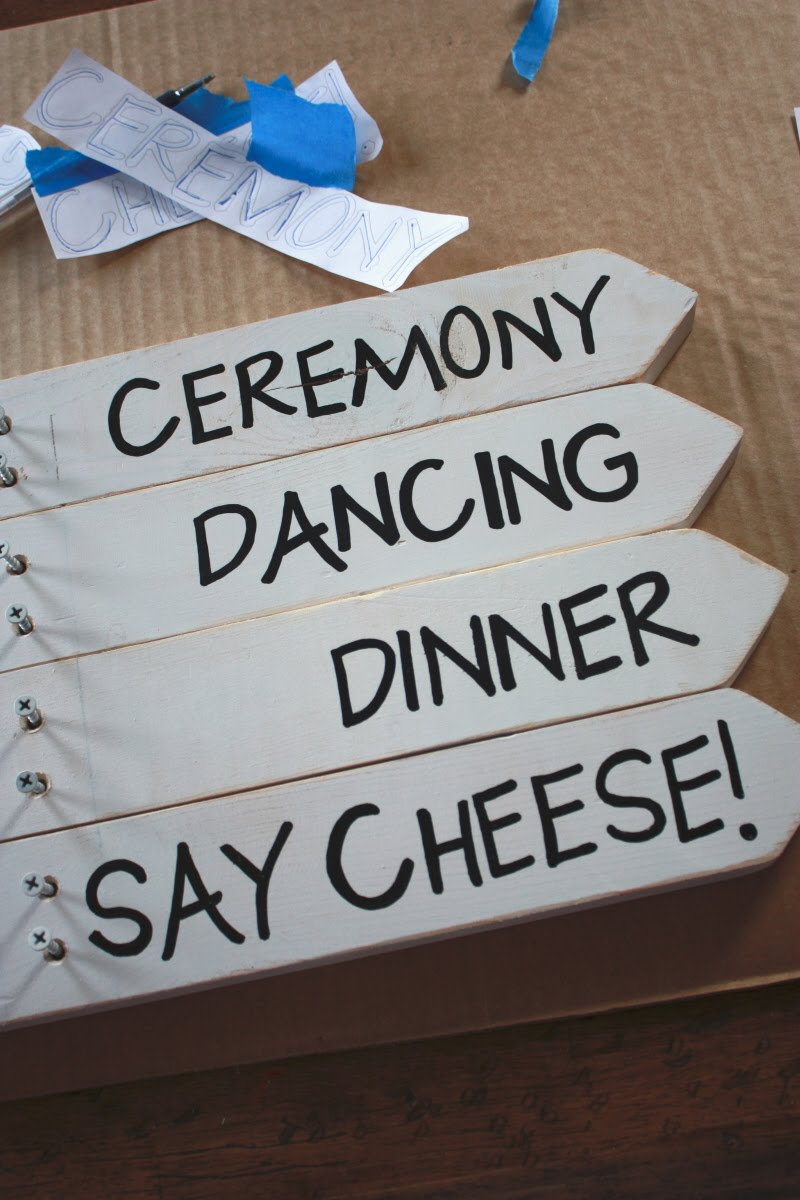 The arrows all got a coat of poly since this would be an outdoor sign...and just in case the rain decided to show up at the wedding...
 Luckily for all of us, it didn't!
Two screws in each arrow was all it took to keep them in place...


And here it is at the wedding!

 It took a bit of time to make, but mostly it was just waiting for paint to dry...and I am always impatient when it comes to drying paint. Other than that it was really quick, easy and super cheap to make!
The wedding was fantastic! I am talking with the photographer right now to see if she'll let me post more of her photos from that day. It was sunny and gorgeous and the grounds were stunning!
We'll see. Fingers crossed that she'll let me show you more photos!
(No pressure or anything, Tiffany!)
:)
In the mean time, you can check out her website:
TiffanyBurkePhotography.com
and her
Facebook Fan Page
Congratulations, Kelly & Cherisse!
We love you!

P.S. I am linking to:
Just Something I Whipped Up at The Girl Creative
Get Your Craft On Tuesday at Today's Creative Blog
Show & Tell Day at Blue Cricket Design
Outdoor Wednesday at A Southern Daydreamer
Transformation Thursday at The Shabby Chic Cottage
Thrifty Thursday at Tales From Bloggeritaville
100 Under $100 at Beyond The Picket Fence
Get Your Craft On Thursday at Life As Lori
Strut Your Stuff Thursday at Somewhat Simple
Make It Yours Day at My Backyard Eden
Inspired By at The Inspired Room
DIY Day at A Soft Place To Land
Tomorrow we are spending the day, not only attending, but also helping with a wedding for some friends. Or...family.
Friends?
Maybe both.
The line gets blurred because really, they're our friends, but technically (ready to follow this?) they are Will's sister's husband's brother (Kelly) and his fiance (Cherisse).
:)
They're family.
Our involvement in the wedding starts with two signs that we have built that will be part of the wedding decor.
The first, a rustic sign for the lovebirds...
 I have seen countless versions of these on wedding blogs, but took my own approach to creating this one for Kelly and Cherisse.
It started with simple fence boards that we bought at Lowe's. We cut them to measure just over 3 feet x 3 feet.

We chose rough pieces, but distressed them even further to achieve that "old" look...


We attached the horizontal boards to vertical pieces of wood, then ran a strip of wood diagonally between the two to ensure that the wood wouldn't be able to shift...

 The look I was going for was that of a pallet. My original thought was that I would just use an actual pallet - one that I could find on the side of the road, or behind a grocery store (asking permission to take it first, of course!), but all the pallets that I saw had big gaps in between the boards and that wasn't going to work for this project.
I think this pallet turned out perfectly...

I stained the newly built pallet with spray stain (one of my absolute favorite products!), which is so easy on these boards because it's a one step process. These boards are so rough and porous that the stain soaks right in - no wiping off required!
 Spray stain is kind of on the pricey side, so I skipped spraying the back. The pallet will be leaning up against something for the wedding and afterwards, when Kelly and Cherisse take it home, their plan is to hang it on a wall.
 I just made sure to spray everything that would be seen from the front and sides...

I got all of the letters from JoAnn Etc. They were about $1.25 a piece. Do the math and you'll find that this sign just got a little pricier than I had anticipated, but these were the right letters to choose. There were other fonts available, but I (and the lovebirds) prefer clean and simple - no swirls or script or anything frilly or fluffy.
These were the one's! A few coats of white spray paint and they were good to go...
 Thanks to the rain (summer doesn't officially begin in the Pacific Northwest until July 5th, you know!) and a spray painting project that I had going in the garage, I was forced to do the second half of this project indoors. My bedroom is the only place that I can close the door and keep the kiddos out, so...
I set it up in our bedroom...
 First I found the center of each side and marked it with tape so that I would have a visual cue for where my letters should be...
 I figured the best way to do this was to lay the letters out just as I wanted the finished product to look...
then run a length of painters tape under them to help with placement, and then start in with the wood glue...
 This step was a bit nerve wracking!
Of course, it would have helped if I had been able to be in a bigger space - I had to straddle the pallet because I didn't have any room to move on either side! On the left was our bed, and on the right, the wall. It felt like a leg workout by the time I had adhered all 17 letters and numbers.
And remember me telling you that my room was the only safe place for this project? That it's the only place I could definitely keep the kids out of?
I don't know how she got in...
 ...but I was already in the middle of getting all the letters set and when you find your groove, you just have to go with it!
Luckily, she stayed on the bed, but that didn't stop her from jumping and doing somersaults - which resulted in me saying 150 times "Be careful!!!!"
Luckily, the letters went on pretty well using the wood glue. There were a few that gave me a hard time just because the wood isn't perfectly level on every board. I had to remove a few letters, add more glue and then reset them to make sure that the glue was making a connection between the letter and the board. And unfortunately, the wood glue we have doesn't dry clear (is there a wood glue that does?) so I had to be super careful to place it back in it's exact spot so that I wouldn't be left with any yellow glue stains.

That left me needing to add periods in between the date numbers and an ampersand in between their names. A white paint pen seemed like the best choice even though I knew that the rough boards would do a pretty good job at chewing up the tip of my pens.

A penny was the perfect size period, so I traced it with a pencil...
 ...and it left just enough of a mark that I could follow with my paint pen.
You can see it here very faintly lined up on the blue tape...

A couple coats of paint and the dots looked great!
On to the ampersand...
 I measured how big I wanted it to be in between their names, then printed it out on my computer. I cut it out, laid it on the board how I wanted it to look, then traced it with my pencil. I had the same faint line that I did with the penny and using my paint pen, I filled it in...
 What a relief!
Finishing that part was nice!
But, I was not at all happy with how fresh the boards looked once all of the letters were on. I wanted it to be way more distressed and have much more variation of color...
 It was nothing that a little date with the palm sander couldn't handle!
The finished product:


I hope they like it!
I love it so much that I am using the leftover pieces of fence board to make a sign of our own.
No, it won't have our names and wedding date on it (that would be a little odd eleven years after the fact), but I'm thinking maybe a saying or a quote. Something that applies to our life and our family.
I can't wait until I have the time to make it!
But today I need to finish the 2nd sign that we made for the wedding. A directional sign that will guide Kelly and Cherisse's guests around the property. So far, so good, but I need to paint on all of the letters today.
Time to get to work!
P.S. I am linking this to:
Transformation Thursdays at The Shabby Chic Cottage
Strut Your Stuff Thursday at Somewhat Simple
Make It Yours Day at My Backyard Eden
Show And Tell at Blue Cricket Designs
Saturday Nite Special at Funky Junk Interiors
Momspiration Mondays at Moms By Heart
I just finished making an Established Sign for a friend of mine. She wanted it to include their last name and the year they were married.
I love how it turned out!


...but I think I like this one even better!


I am even tempted to make a new one like it for our house!
This is the one we currently have...

...but you may see something different up there in the near future!
She hasn't seen it yet, but I'm pretty sure she will like how it turned out!

Subscribe to:
Posts (Atom)


